
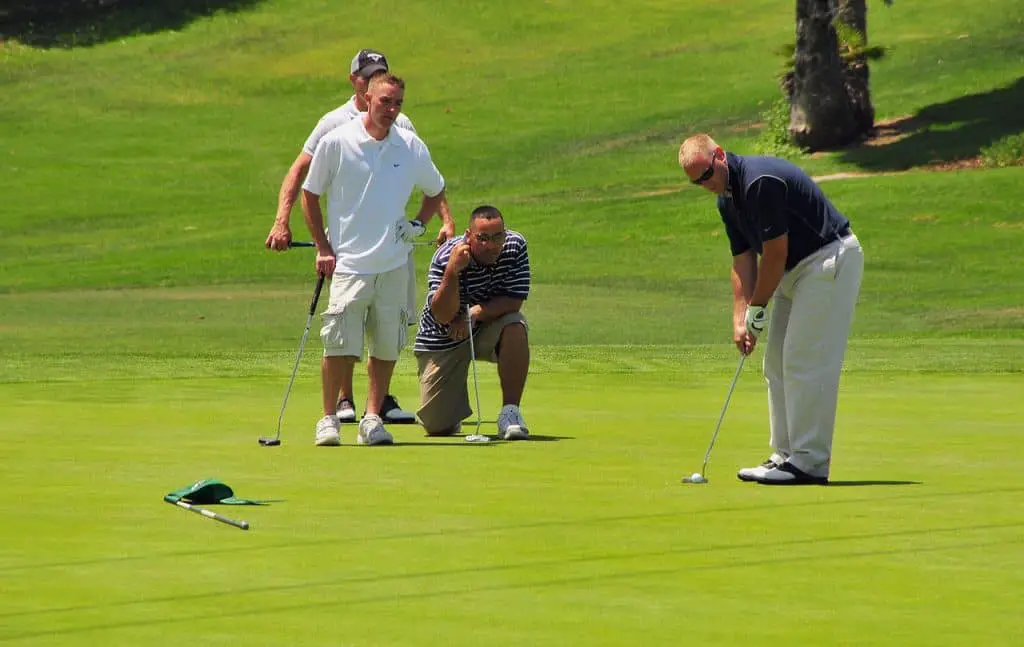
Golf is a complex game with many different aspects. Being able to hit the golf ball with your woods and irons is very important, but those good shots will be worthless if you aren’t able to putt the ball into the hole.
As a beginner, there are many new things to learn, but my advice is to start at the green and to work it backward from there. A good day on the greens will make all the difference in the world.
Below we will take an in-depth look at the basic fundamentals of the putting stroke and by the end of this article, you will have all of the knowledge that you need to learn how to putt in golf.
If you are looking for a little help choosing a putter, check out our guide on the Best Putters For High Handicappers.
Reading The Putt
The ability to read the line of a putt is very important. It is impossible for a perfect putt to find the bottom of the cup if the putt wasn’t hit on a good line. Green reading is both an art and a science, it is also something that we as golfers will never perfect, there are just too many variables to account for.
For beginners it is important to read the general slope accurately. By starting the ball on a good line, the putt will have a chance to drop, but more importantly it will end up close to the hole which will ensure an easy two putt.
Good green reading skills require attention to detail, awareness and focus. When you walk up to the green it is important to look around you, look at where your golf ball is and look at the general lay of the land. More often than not it will be clear where the high point is, with that in mind you will have a good idea in which direction your golf ball should turn.
A good way to approach green reading is to keep the following analogy in mind: if you were to pour water out onto the green next to your golf ball, in which direction would the water flow? The direction in which the water would flow is the direction in which your golf ball will turn. The next step is to think about how fast the water would flow in that direction, if you think that the water would flow slowly there will be a small amount of turn in your putt and vice versa.
Want more about this…check out our guide on how to read a green.
Marking and Replacing the Ball
When you arrive at the green and your golf ball is on the green the first step is to mark it with a flat marker, coins make great markers. We mark our golf balls on the green for a variety of different reasons, the main reason is to get it out of the way in order for your playing partners to be able to putt. Alternatively, by marking the ball on the green you are able to clean your golf ball and you are able to replace the golf ball in a strategic manner.
First let’s talk about how to mark your golf ball. As mentioned, a coin is a great marker, when you put your marker down always make sure to place it directly behind the golf ball with the ball being directly between your marker and the hole.
Once your marker is on the ground and you have picked up your golf ball always make sure to clean it. A small piece of mud can greatly affect how your golf ball rolls on the green.
Last but not least by marking your golf ball it allows you to replace the golf ball in a strategic manner. Majority of golf balls feature branding/writing on them that resemble a thin line, alternatively you can draw a thin line on your golf ball with a permanent marker and a ball marker accessory.
When you do replace your golf ball back onto the green in front of your marker line the golf ball up at your target by using the line on the golf ball. Remember that the target isn’t the cup, your target is the line that you would like the ball to start on. If you read the putt and you think that it is going to turn 6 inches from right to left, then your target where your line on the golf ball should be aimed at is 6 inches to the right of the hole.
Putting Grip
How you grip the golf club is very important, the grip of the club and how we hold it in our hands is the only connection that we have with the golf club. How we grip the club directly affects the angle of the clubface through the hitting zone and this is no different with putting.
The putting grip however is different to how we grip a normal club in a variety of different ways. Putting grips in general differ in shape and in size from normal grips, putting grips are mostly square and nowadays they are available in a variety of shapes and sizes.
At the end of the day the following is important to think about when deciding on how to grip the putter. As a beginner you want your putting grip to feel comfortable and you want to feel like you have control over the putter head. For some golfers a regular traditional grip will be just fine, others might prefer the claw grip or even the left-hand low grip. Don’t be afraid to play around with your putting grip, always make sure though that it meets the above criteria of comfort and control.
Once you feel comfortable with your putting grip it is important to think about grip pressure. Grip pressure is a balancing act, you need to hold onto the putter tight enough to ensure control over the clubface, but you don’t want to hold on too tight because that will cause tension in your hands and forearms which in return will affect the rhythm of your stroke.
When you think about grip pressure imagine holding a tube of toothpaste. You want to hold on tight enough so that the tube doesn’t fall on the ground, but you don’t want to squeeze it too hard and spill toothpaste all over the floor either.
Stance and Setup
The setup is a very important basic fundamental that is important through the bag from putting to full shots. The best putting stances are fairly simple and can be broken down as follow:
- Stand with your feet next to each other
- Take a small step to either side with both of your feet, your feet should now be shoulder width apart and the golf ball should be in the middle of your stance
- Bend your knees slightly and hinge forward through your hips until your eyes look directly down at the golf ball
- Allow your arms to hang down in a relaxed manner
- Ensure that your feet and shoulders are aligned perpendicular to each other
The above steps are a quick summary of what a good putting setup should look like. All golfers are unique though, with that being said it is important for you to find a putting stance and setup that you are comfortable with.
Alignment
The concept of alignment within putting can be broken down into three parts, alignment of your body, alignment of the clubface and alignment of the golf ball.

Before you are able to align yourself to hit a putt you have to pick a clear target that you can aim at. Once your target has been identified the next step is to align the line on your golf ball with your target. There is no rule that says you have to use the line on your golf ball to line yourself up when you putt, but for beginners it is highly recommended.
The next step is to align your putter head with the line on your golf ball. Majority of putters feature lines or other alignment systems on the top of the putter head. Place your putter behind the ball and ensure that the lines on your putter are aligned with the line on your golf ball.
Once the putter head is aligned it is time for you to align your body. Good alignment of your feet, hips and shoulders is vital to ensure a good putting setup.
Basic Mechanics of a Putting Stroke
The putting stroke can become very complex if you were to take a deep dive into the physics behind it, but as a beginner you only have to focus on the basic mechanics of the putting stroke. Putting can be very intimidating for beginners, this doesn’t have to be the case though, below we will take a closer look at the basic mechanics of the putting stroke which will get your putting stroke on the right track from the get-go.
Shoulder turn
The shoulders can be described as the engine of the putting stroke. Beginners tend to use their hands and arms to power the putting stroke and this is where they encounter many challenges.
An easy analogy to think about is the pendulum analogy. At address the shoulders will turn the putter back, at the top of the back stroke the weight of the putter will allow the “pendulum” to change direction and to return back to impact. The shoulders will then continue to power the through stroke and the end result is a smooth putting stroke.
It is very important to remember that it is a putting stroke and not a putting hit. Putting strokes that are powered by the shoulders will ensure consistency which in return delivers good speed control.
Path
The putting stroke is a fairly basic motion, the putter head goes straight back and then it goes straight through again to ensure the delivery of a square clubface at impact. On longer putts the arc of the path will change slightly. On the back stroke the path will start out straight before moving slightly to the inside, it will then return to a straight path through the impact zone before finally ending slightly towards the inside on the follow through.
The most important part of the putting stroke is the impact zone, the impact zone can be classified as the 6 inches before the golf ball and the 6 inches after the golf ball. If the putter head moves through the impact zone with a square face it doesn’t matter what happens throughout the rest of the stroke.
As a beginner, focus on getting the putter head square through the impact zone, it might seem fairly simple but if you can do this on a regular basis your putting will improve drastically.
Strong wrists
When we putt we stroke the golf ball we don’t hit it. Beginners tend to struggle with this concept and the difference between a stroke and a hit. One of the main culprits that turn a stroke into a hit is the wrists. The ability of our wrists to bend and flex gives it the power to hit the golf ball. Quiet/strong wrists throughout the putting stroke will ensure that you cannot use your wrists to hit the putt.
If you are able to keep your wrists quiet/strong it will allow your shoulders to act as the engine of the putting stroke which in return will ensure a good stroke and good results on the greens.
Quiet eyes
All golfers have heard the phrase “keep your head down”. With putting we have to keep our eyes quiet through impact, this might sound easier than what it actually is but it is a very important basic fundamental of putting.
Beginners have the tendency to follow the putter head and the golf ball with their eyes and subsequently their head. Movement of the eyes/head alters the level of your body which leads to inconsistent strikes.
If you are able to get this basic principle under wraps early on in your golfing career you will save yourself a lot of effort in the long run. A quick and easy way to learn how to keep your eyes quiet is to focus on one dimple on your golf ball throughout your stroke. Continue to focus on the position of that dimple until after impact, ideally, we want to hear the golf ball drop into the cup and not see it miss.
3 Easy to do Putting Drills for Beginners
1. Train Tracks
One of the most important fundamentals to have for both beginners and seasoned players is a putting stroke that goes straight back and straight through the impact zone. When the stroke gets longer on lag putts the arch of the putting stroke will be slightly towards the inside, which is what is supposed to happen. The first 3 – 4 inches on the backstroke and follow through however has to be as straight as possible.
Having a putter head that moves through the hitting area with a square clubface will lead to consistency in strike and direction, thus more putts holed with good speed. The train track drill is a great putting drill to practice this fundamental with.
Take two alignment sticks, or golf clubs, and align them in the shape of train tracks on the putting green or even on your carpet or home putting mat, set up the train tracks about 6 feet away from a target, an empty plastic cup is a good substitute for a hole if you do this drill at home. The width of the tracks has to be slightly wider than your putter’s width, it is important that your putter can move freely between the tracks, but don’t allow yourself too much room for error.
This drill will improve the path of your putting stroke, and the great thing about it is that it can be done at home with ease which is great for beginners.
2. Prayer Grip
Another key fundamental of a consistent putting stroke is good rhythm. Having good rhythm will lead to consistency in strike and distance control, both factors that will lead to improved putting results.
In order to have a putting stroke with good rhythm it is important to use your shoulders to rock the putter back and through. Gripping the putter with 2 fingers only is a great putting drill that will force you to use your shoulders in order to stroke the putt.
Open your hands up, place your hands on either side of your grip, the hands will resemble hands that are in the prayer position, line the grip up so that your middle fingers are the only 2 fingers that are touching the putter grip.
At first it will feel nearly impossible to putt the ball, but your body will figure out that you need to use your shoulders in order to generate enough speed to make a putting stroke. This is a great putting drill that will train a good shoulder turn in your putting stroke, and as a byproduct of a good shoulder turn you will ensure improved rhythm.
Leave your putter and a couple of golf balls in your living room on the carpet, hit 10 putts with the prayer grip every time you walk past, as a beginner this drill will definitely speed up the learning process.
3. Two Putt Speed Drill
Speed is arguably the most important factor in putting and as a beginner good speed on the greens is vital. Many amateur golfers and especially beginners blame missing short putts when they have a couple of 3 putts per round, but most of the time distance control on longer putts is the problem.
It is important to take a close look at your putting game as a whole in order to blame the correct area for your putting woes. The 2-putt speed drill is a great putting drill that will help you eliminate those dreaded 3 putts. Choose 2 holes on the putting green that are about 30 – 40 feet away from each other, take two balls and putt between the two holes, putt out every putt and continue going until you have 10 consecutive 2 putts.
This drill will help with more than just your speed putting, it will also challenge your mental game. Beginners tend to struggle with the on-course pressure that golf elicits within us, the more you practice under similar circumstances the quicker you will get used to it out on the golf course.
Conclusion
Drive for show and putt for dough, this famous old golf saying might be old but it is very accurate. Beginners might not realize this but nearly half of the shots that we hit during a round are putts. Putting is very important and as a beginner good putting can help you to save a tremendous amount of shots per round.
For beginners the basics are very important, a good setup, proper alignment and a stroke that’s powered by your shoulders will go a long way in getting your putting stroke technique off to a good start at the beginning of your golf career.
Last but not least, practice, practice, practice, as a beginner it is vital to create good habits right from the get-go!